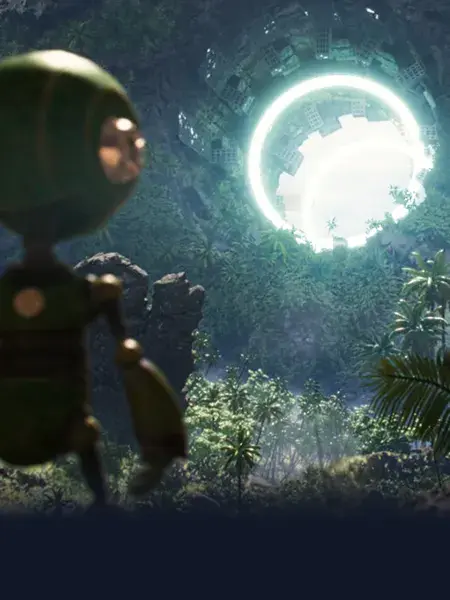


CG Spectrum recently released a commercial, and it is AWESOME! Developed and created by some of our brilliant mentors and department heads, the whole production took place in-house — from planning (pre-production) to filming (production) right through to the visual effects (post-production).
Want to go behind the scenes of our Dune-inspired commercial?
We break down the post-production process, walking through the visual effects pipeline step-by-step to illustrate how the CG Spectrum Commercial was made. A lot of talent, hard work, and a solid team effort went into creating this commercial, and we are super proud of the final result!
Scroll to the end to watch our step by step VFX breakdown and go behind the scenes of our live action shoot in the Californian desert.
CG Spectrum's commercial — produced entirely in-house.
Editing
After filming, Director Theo Brown did an initial edit, cutting together the footage from our live-action desert shoot before passing it over to Jeremy Chinn, CG Spectrum’s Global COO. Jeremy, a 3D modeler who's worked on films such as Guardians of the Galaxy, Frozen, and Maleficent, moonlighted as Editor for our commercial.
Jeremy refined the cut and added an overall retime to ensure it hit the 30-second mark, which is the typical timeframe for a video commercial. He then sent it over to the CGS team so they could begin planning out the visual effects.
For a VFX Artist, timing is everything. Timings and cut order determine when the action happens, and for how long, and impact almost every step of the VFX pipeline — from matchmove right through to compositing. The edits and timings provided by Jeremy helped shape the action of the sandworm: the star (or, more accurately, the villain!) of our commercial.
Concept art
Our star started from humble beginnings — as an idea translated into a brief. In order to create visuals for the sandworm, Dept. Head of Concept Art and Illustration, Brandon Reimchen (EA, Activision, Capcom, Gree, and Disney) was provided with a written brief along with reference images from Star Wars and both Dune films.
 Sandworm diagram by David Stein for the original Dune film (1984)
Brandon also collected his own reference, drawing inspiration from bot fly larva and deep ocean scale worms, as well as turtle shells, alligator scales, and even a bore drill bit. Knowing how to gather reference carefully is a crucial component of every VFX artist’s job.
It is important that you synthesize what performance or action is necessary for the shot and then build something plausible within the narrative. Put lots of time into the ideation and gather reference before you start. -BR
 Art imitating life; horrifying real-life deep ocean scale worm (Image: Philippe Crassousscience)
Brandon began by sketching a basic thumbnail in Adobe Photoshop to get the proportions right. He then moved into ZBrush to sculpt a maquette where he could quickly produce volumes and elements like the beak and teeth, the shell, and the spines. Once he was happy with the maquette, he gave it a quick paint and then exported a render to Photoshop, where he finished the painting.
The end result? Truly terrifying!
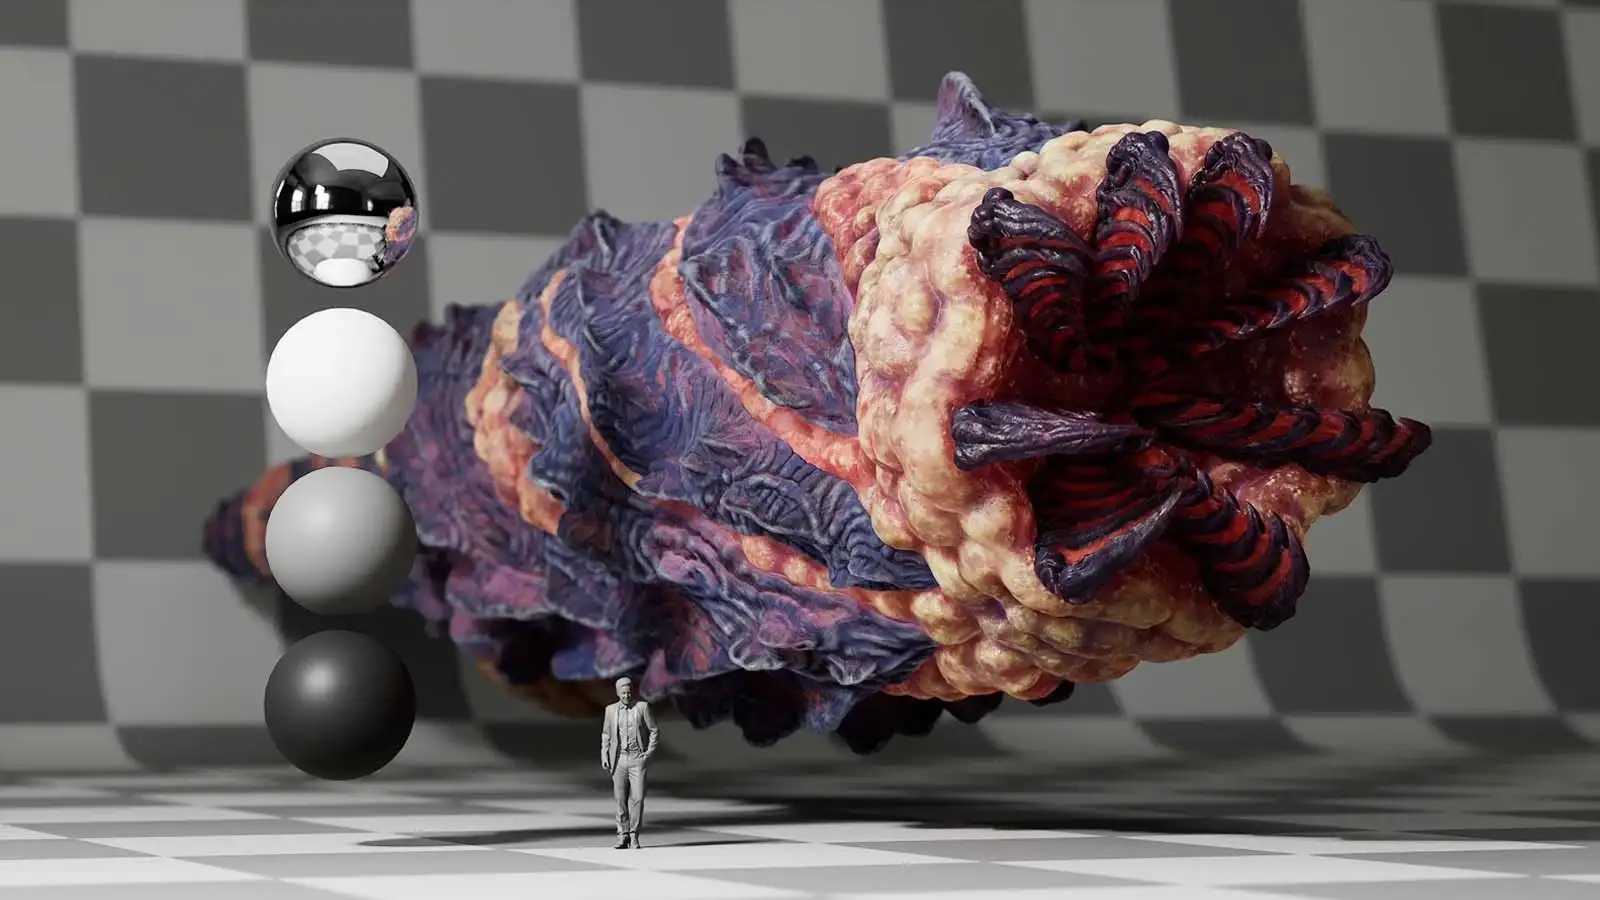
 Final concept art of CG Spectrum's Sandworm by Brandon
Model/Texture
With our sandworm concept approved, Model-Texture Artist and CG Spectrum 3D modeling mentor Chun Chun Yang had the job of ensuring Brandon’s concept art reached its full, hideous, 3D potential!
 The final 3D model (top) referencing the approved concept art (lower left-hand corner)
Chun Chun created the base mesh using Autodesk Maya, sculpted and retopologized it in ZBrush before going back into Maya for UV unwrap. Next, she moved into Substance 3D Painter to give the sandworm color and texture. Along with her successful texturing tutorials on YouTube, Chun Chun has contributed to films such as Ready Player One, Deadpool, and Beauty and the Beast.
Chun Chun’s main challenge was capturing the sandworm's organic structure with a good base mesh that was not too heavy but still detailed.
If we want this to look good, we need to build a solid foundation.
A conscientious Modeler ensures their geometry can easily be passed down the pipe for other departments to pick up and work with. One of these departments is rigging.
Textures added to the model in Substance Painter
Rigging
Worms may not have bones in real life, but this is where our sandworm differs (that, and also, real worms don’t try to eat people)! Rigger and CGS Dept. Head of 3D Modeling, Bryan Bentley was next in line to pick up Chun Chun’s model.
Working for The Jim Henson Company as well as feature films like Pacific Rim and The Golden Compass, Bryan was no stranger to unique animal structures! He generated a rig for the sandworm — the “bones” and controls of the sandworm — so it could be animated in a realistic fashion.
Mouth test, in rigging, working on the mouth retraction system
Bryan points out that there are two main parts to rigging: rigging and deformation. Rigging is the act of generating the bones and controls that the animator will manipulate. Deformation is the process of making the points of the model, following the rig/armature in a smooth and believable manner.
Knowledge of human and animal anatomy goes a long way as a rigging artist. Bryan studied insect morphology to make sure he was getting the movement capabilities of our sandworm right so that animation could do their thing.
Layout/Environment
In parts of the VFX pipeline, some departments can work concurrently. While Bryan was rigging the sandworm, other artists were busy working on the layout and CG environment — where all the action takes place!
WIP layout
Drawing inspiration from the vast desert landscapes of Dune and The Mandalorian, the team created the initial environment and background design based on the timing of animated elements and what was happening in the live-action plate.
When working on layout and blocking tasks, it pays to have general skills across many disciplines—modeling, texturing, lighting, camera work, simple animation, and FX—to help convey the visual message and set up the scene. -DH
At this early stage, layout and environment artists often work with proxy geometry to easily move assets around the scene until everyone is happy with it (and while they wait for the final, approved models from upstream departments).
Initially, we were going to just have a desert with no signs of life but felt like something was missing. So, we decided to add some buildings on the dunes to give the background a sense of story and history.
 Layout progress: adding in low-poly set dressing pieces to temporary background dunes in Houdini before handing the scene over to William to add in the higher-res KitBash assets and final dunes in Unreal Engine.
We didn't have time to create an entire village from scratch, so we headed to the KitBash3D website to see if they had any world kits with assets that would work for our scene. After checking our references and artwork, we chose the Kitbash3D Outpost pack as it seemed the best fit for the aesthetic we were trying to create.
Look-Development & Lighting
Once the layout was locked down, CG Spectrum mentor of the Realtime 3D and Virtual Production course and Realtime Artist William Faucher helped refine the environment. William shares his passion and knowledge with aspiring artists and creators through his popular Unreal Engine tutorials on YouTube.
William used Unreal Engine 5 (the latest version recently launched!) to add set dressing and lighting, and then rendered it. He notes that when it comes to lighting, you often want it to match the plate, but you also want it to ensure your CG characters, sets, and props “pop” too. So, it becomes a balancing act.
 WIP background environment for CGS commercial, set-dressed with all assets, lit and rendered by William using Unreal Engine 5. CG Spectrum is proud to be an Unreal Academic Partner & Authorized Training Centre.
Lighting isn’t an exact science. You need to go with your gut 80% of the time. Often, you’ll need to break away from what is “realistic” to make something look good/better. -WF
William also spruced up our sandworm, so it was camera-ready! Using the model and textures from Chun Chun, he matched the overall look of the worm to be closer to Brandon’s approved concept art while also referencing a bunch of stuff in nature (nature offers us an abundance of cool, inspiring reference!).
 WIP sandworm shaders in William's scene. The left read node is the beauty pass, the right read node is the render with proper, non-aliased Z-depth.
Character Animation
While the environment was being refined, CG Spectrum’s Animation Manager, Scott Claus, picked up the rigged sandworm and tested it out. Scott has worked in both 2D and 3D Animation and was part of the team that won an Oscar for best visual effects for Life of Pi.
Scott did preliminary tests and offered feedback after putting the worm “through its paces” — bending it, stretching it, and doing animation tests similar to those he expected to be doing for the actual project, so Bryan could make any adjustments if necessary.

Scott then performed a quick worm-like motion that he showed the team for any notes. Regular and constructive feedback is another essential component for team-based VFX projects, and the artists on this project were in constant communication. This type of communication is usually handled by the Production team (Coordinators, Managers, and Producers), but the team managed themselves for this project.
Next came the animation blocking stage — a rough pass to demonstrate the sandworm’s position and basic actions. While this was happening, Scott was also watching a ton of reference for inspiration — Dune, Star War’s Return of the Jedi, videos of real-life pythons, and the 'Graboids' from the 90s movie Tremors.
 A Graboid coming out of the sand in the 1990 film, Tremors, one of the worm-like creatures Scott used as animation reference
Every fantasy character has to have some basis in reality, or the audience won’t buy it. As far back as Disney’s Fantasia in the 40s, animators studied birds to inspire the look of the dinosaurs in that film. -SC
Once the blocking and movements were all worked out, Scott moved on to refining the sandworm’s wicked wiggle, which required various iterations — from the ‘Free Willy' pass to the ‘Rage' pass to the ‘Hybrid' pass, and more!
WIP Animation with picture-in-picture featuring Scott's 'Rage' pass
FX
Working with the timing of Scott’s animation, Digital FX Supervisor, and Dept. Head of Visual Effects, Daniel Hourigan added a range of FX elements using SideFX Houdini. Daniel has worked in visual effects for almost 15 years and was the FX Lead on movies such as Terminator: Dark Fate, John Wick: Chapter 3, and Aquaman.
In reaction to the sandworm's movement, a large desert environment (such as ours) required plenty of moving sand and billowing dust. Daniel also worked on the shockwave that ripples over the dunes and the spit coming out of the sandworm’s mouth — which he found really fun…and gross.
Ah-choo! Sandworm FX RnD; trying to get the spittle right
Daniel’s biggest challenge was dealing with the resolution of the sand and trying to get enough points into the simulation to make it look realistic and render without making his computer explode!
Sand FX RnD, reacting to the sandworm's animation
Buy a couple of extra hard drives to store all the data you are going to generate from massive simulations. By the end, the amount of data generated [for the commercial] was well over a Terrabyte! -DH
Compositing
The approved work from upstream (environment, animation, FX, lighting, etc.) was then handed to the commercial's VFX Supervisor and CG Spectrum's Dept. Head of Compositing, Sean Amlaner to work on the compositing — the final stop in the VFX Pipeline.
Sean has worked as a Compositing Supervisor, Senior Compositor, and Senior Artist Trainer for studios such as Technicolor VFX, Sony Pictures Imageworks, Disney, and many others.
Working with passes coming from Unreal 5 as well as Houdini, Sean prepared the plates and extracted the live-action actor from the green screen. We also had to actively rotoscope the actor (cut him out frame-by-frame) from the initial desert scene. A lot of this work required Mocha Pro from Boris FX.
 Live-action plates — desert set (top) and green screen in a studio (bottom)
A significant part of Sean’s role was blending both the live-action and computer-generated parts in Foundry's Nuke to appear photo-realistic and feel seamless in both the desert and the office scenes. This included adding digital assets from FootageCrate, such as a warm transition lens flare (used in the desert shot).
 Integrating the actor into the CG environment
Lastly, Sean had to add a screen insert for when our actor sat down at the computer to make it look like he was interacting with a student in the scene. The “student” used in the screen insert is CG Spectrum student, Head Teaching Assistant, and Community Coordinator Penny Gaubatz, who also illustrated the fantastic poster art for the project.
 Thumbnail versions of the movie poster, drawn by Penny
Penny used Adobe Photoshop and a Wacom Intuos 5 Tablet for her artwork, with a small physical sketchbook on the side. Her work was based on the brief of the commercial and Brandon's approved concept art of the sandworm.
Working as a student alongside all these really talented mentors and leaders has been thrilling and a real eye-opener! -PG
 Penny's final version of the commercial's movie poster. VFX Supe, Sean, added a little easter egg and inserted Penny's poster into the last shot — see if you can spot it!
Lastly, our commercial went back to Jeremy for sound, color, graphics, and final timing in DaVinci Resolve. Then it was exported and ready to go!
And that’s how the creative, talented, and industrious team of mentors at CG Spectrum created the visual effects for our Dune-inspired commercial.
If you’d like to learn more about post-production and also check out what happened during the production stages, check out our behind-the-scenes videos, below.
Pre-production: Live-action shoot
Post-production: Step-by-step VFX breakdown
Learn directly from industry pros!
If you want to be able to create incredible scenes like the ones in our commercial, CG Spectrum can help. As an online visual effects, digital art, virtual production and animation training center, our industry-led courses—many of them mentored by the very people who made our commercial—can help you take the next step in your career within the entertainment industry.
Check out our beginner and advanced courses!

Related Links