
CGS 3D Modeling Specialization student, Benjamin Oman breaks down how to make a polished 3D character, and provides some helpful tips and tricks.
Using Maya, ZBrush, Marvelous Designer, and Substance Painter, Benjamin details how he modeled, textured, and added cloth to his 3D model of the character from the Battle Chasers: Nightwar video game, Alumon.
He also looks at importing assets into Unreal Engine to give them a cool background environment with atmospheric lighting for those finishing touches that will make your work stand out!
 Fan art: Stylized 3D character model of Battle Chaser's Alumon, by Benjamin Oman
Hi Benjamin! Thanks for taking the time to chat with us. Please tell us a bit about yourself?
Hey! It's a pleasure, thanks for having me. My name is Benjamin Oman. I am 23 years old, and am from Austria!
After graduating from high school, I was considering what career path I would like to take. During my research, I came across 3D art and 3D modeling. I was instantly drawn in by the thought of creating video game environments and characters. Sometime later, I got in touch with a student from CG Spectrum who told me about some of the school's digital art courses.
After that, I decided to study at CG Spectrum and haven’t looked back since!
Currently, I am in the middle of the 3D Modeling Specialization Course, and I am trying to learn as many tools and styles as possible that are necessary to complete my tasks and projects.
I tend to go towards stylized art because I love the saturated colors and fantasy that can be created with it. I guess this mainly comes down to growing up playing video games on Nintendo consoles such as Pokémon, Zelda, Fire Emblem, Xenoblade Chronicles, and others.
Benjamin's 3D character model of Alumon (from the game Battle Chasers: Nightwar), created as part of CG Spectrum's 3D Modelling Specialization Course
Your fan art of the Alumon character, which you modeled for your CG Spectrum 3D Modeling Specialization Course, looks excellent! Can you take us through your process?
Thanks a lot for that. I am glad you guys like it! Happy to provide a step-by-step run-through of how I made my 3D model — here it is:
Reference Collection
Before starting a project, I look through Artstation, Pinterest, or Google Images for inspiration.
It’s important to do proper research and gather good reference.
When I find stuff I like, I store it in a collection and build a library for each topic, like characters, environments, hard surfaces, etc. During this process, I stumbled across the awesome concept art of Alumon created by Joe Madureira. I made a PureRef file to structure and organize my reference images.
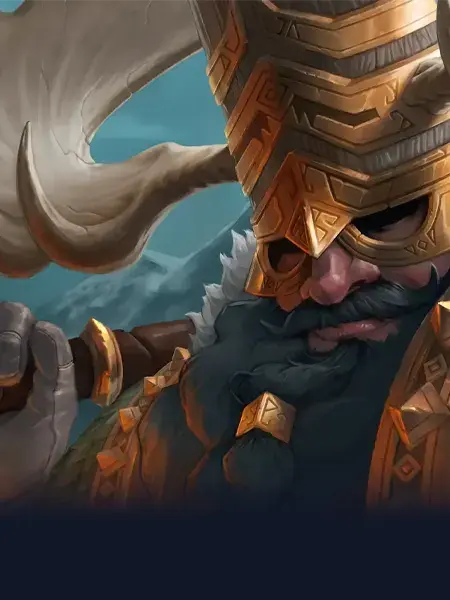
 Alumon concept art by Joe Madureira, on which Ben based his 3D Model
After choosing the main reference, I broke down the known elements, such as clothing, armor, weapons, and accessories. Then I gathered references for all those individual pieces so I had some ideas on how I could approach them later on, and to get a better impression of the look I wanted to achieve.
 The reference Benjamin gathered and categorized before getting started on his 3D model of Alumon
Block-out in Maya
Next, it was time to start creating the 3D character. I imported the concept art into Maya and roughly blocked out the base anatomy shapes to use as a base mesh which I would then sculpt in ZBrush. (This can also be done directly inside ZBrush, but I decided to do it this way because it felt more comfortable.)
 The beginnings of Alumon: 3D character block-in Maya
Male base mesh in ZBrush
I used a lot of anatomy references to create a male base, which I can reuse for future projects.
It is easier to work in a low-resolution stage to get all the shapes and volumes down. After nailing these, you can subdivide the mesh a few times and then refine the overall anatomy.
The main tools I used for this stage were Clay Buildup, Standard, Smoothing, and Dam Standard brush.
 Male base mesh for Alumon, sculpted in ZBrush
After the male base was done, I used a combination of masking body parts and moving them with the Gizmo 3D manipulator, as well as the Move brush to achieve the looks and anatomy of the concept art.

Clothing in Marvelous Designer
I had to keep in mind parts of Alumon’s clothing — like the big hip belt, leg armor, and chest belt — that would interact with the behavior of the cloth creation inside Marvelous Designer.
I jumped back into Maya and blocked out necessary elements to make the placement of the cloth easier. When this was done, I was ready to create some basic fabric patterns in Marvelous and put them onto the character.
I ended up including all the visible clothing parts seen in the concept and, thanks to the live simulation inside the software, I achieved some good-looking folds that could then be refined and optimized inside of ZBrush.
 Dressing Alumon: Benjamin added cloth in Marvelous Designer
Detailing in ZBrush
Once I was satisfied with the results achieved in Marvelous, I exported everything back to ZBrush to start doing the main work. Now it was about bringing in all the rest of the elements shown in the concept art, such as the fur, and the gem on his chest.
 Benjamin added details to his 3D model of Alumon in Zbrush
Everything I had done so far was in a rough state. Now, it was time for the fun part: adding detail and giving everything the same quality!
Firstly, I tried to get all the volumes and shapes down by using the Move brush and the Gizmo 3D manipulator by bringing everything to the proper position on the body. Once done, I started to subdivide the meshes and gave them more resolution so I could properly sculpt each piece.
I usually begin by trimming and adding some edge damage on the metal pieces using the Trim Dynamic brush, and cleaning the strokes up with the Orb Flatten Edge to give them a sharper look.
I used the same technique for adding wear to the leather parts, such as the belt and bag. To get some crisp edges and flat planar surfaces on elements like the mask and the cross on the belt, I mainly used the Clay Buildup and HPolish.
The folds I got from Marvelous were more realistic than stylized, so I had to simplify them with the Smooth brush and then build some of the folds back up again. For that, I used the Standard brush to get the volume of the folds. Then, to add some more defined edges, I used the inverted Dam Standard brush by holding ALT while doing the pen strokes.
To create the fur, I purchased an IMM brush pack on ArtStation, which allowed me to add single pieces of fur strips that I could then place onto a sphere and adjust with the Gizmo 3D. In order to get more surface details, especially on the metal pieces, I used a brush with an alpha texture that included some good-looking surface information which I then simplified with the Trim Dynamic brush to make it more stylized.
 Fur details on Alumon's shawl, created using an IMM brush pack from ArtStation
For the whip and shield, I used the same technique as before: blocking out in Maya, detailing in ZBrush, retopology, and UVs in Maya, texturing in Substance Painter, and rendering in Marmoset Toolbag.
 Details on Alumon's shield
Retopology and UV
After finishing the high-poly mesh, I went back to Maya and did the retopology with the Quaddraw tool.
This is generally a very straightforward process, but, as a rule of thumb, I recommend going big first and not losing yourself in detail. The most important aspect is to get down the proper edge flow and a clean topology.
When this has been achieved, you can add more edge loops to increase the resolution of your character, and refine it with the Relax tool to get a more even distribution of your topology.
 In Maya: Benjamin's 3D model of Alumon with wireframe to show the topology
The last step before texturing is to plan out your UVs. To avoid stretching, apply a checker map to your mesh and see how your cuts and UV unfolds affect the checker texture. The goal here is to achieve minimal stretching and an evenly distributed density to get the same quality of detail later in the texturing process!
It is important to leave as little space as possible in your UV layout so you can get the most detail and information out of it. But be careful with overlapping UV Shells — these need to be avoided at all costs!
Texturing in Substance Painter and rendering in Marmoset Toolbag
My 3D character was now ready to get some color and textures! I jumped into Substance Painter and baked my high-poly details onto my low-poly mesh with the proper naming convention to avoid any baking issues.
For the texturing, I started by blocking in all the materials with a basic color. When I was satisfied with the look, I went into detail by using various layers to add highlights, ambient occlusion, surface details, and color gradients. I often use generators and tweak the parameters to get the results I want for most of these. Adding some handpainted detail can give a nice overall touch to your texturing.
Taking some of the premade Smart Materials and breaking them down to better understand what each layer does is a good way to learn the process behind it and how to use them to implement them in your materials effectively.
I then exported my textures to set up a render in Marmoset Toolbag. To create my render, I placed and duplicated my character accordingly to make him visible from all sides to showcase the details I would like to present. Creating a three-point lighting setup with a key, fill, and rim light is very simple to achieve but very effective. I recommend creating different light setups, selecting the one you like the most, and then refining that one to further increase the quality of your presentation.
You can also add a wireframe render to showcase your retopology skills. Adding a turntable video showing the breakdown from wireframe to grayscale to textured mesh can be a nice touch to present in your portfolio.
You mentioned facing challenges during your process — what were some of them, and how did you overcome them? Did having a mentor help?
Since this was my first sculpted character ever, I faced a lot of struggles like anatomy, how to properly add detail on the individual elements, and how to approach all the necessary steps to create an awesome-looking character.
Having a mentor definitely helped! Hong Chan Lim made me aware of what to keep in mind when creating a believable character, such as paying attention to the forms and shapes before going into detail.
It was awesome to have someone I could reach out to when I was stuck during the process. Getting the weekly feedback also helped in terms of what to improve and what to focus on next to properly finish the project. Additionally, one of the Technical Assistants at CG Spectrum, Pietro Trizzulo, gave me some tips and tricks from his own sculpting techniques, which helped me speed up the process and achieve the results I wanted.
Adding your model to Unreal Engine is not directly part of the course; what inspired you to take your model to the next level, and what was the process involved?
Before taking CG Spectrum’s Modeling Specialization Course, I did the Foundations of Game Art and Animation Course. In Term 3, we learned Unreal Engine. I implemented the knowledge I gained during that course to create some additional renders that demonstrated my understanding of using and integrating game-ready assets into an actual game engine.
After the texturing and basic rigging of my character were done, I gave Alumon a few poses, which I then exported into Unreal Engine 4. I had to set up a master material in Unreal Engine to apply all the textures I’d created in Substance Painter. When this was ready, I placed my 3D model into the scene, and by using the Megascans asset library, I was able to build a simple and small scene around him.
After having the rough ideas down, I started to tackle the lighting. I kept in mind the principles of three-point lighting on the character by using a directional light that lights the whole scene.
You can achieve decent-looking god rays by using Exponential Height Fog and playing around with the scattering settings from the directional light plus the Height Fog.
I highly recommend watching CG Spectrum mentor, William Faucher’s Youtube tutorial on lighting a night-time exterior, since this inspired my lighting.
By adding some Rect Lights in front of the character, I was able to highlight some more areas which made my model stand out better in the scene. Additionally, I added some small, subtle lights on the little light shrines so the character still stood out compared to the rest of the scenery.
Once the lighting was done, I started to populate the scene more by adding grass, flowers, and some other foliage elements with the provided tools of Unreal Engine. To get more plant variation, I tweaked some parameters to give them different rotations and scaling. For the trees, I also used the free Blackalder tree pack from Quixel, which can be downloaded directly from the Unreal Marketplace.
To get a more ambient feeling, I also added some particles representing fireflies. I achieved this by creating a Niagara VFX system with a simple emitter. I added some options that allowed me to control the color, amount, size, and movement of the fireflies.
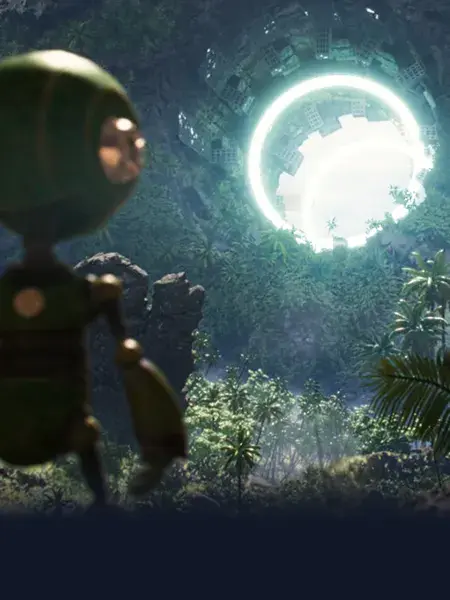
Finally, I rendered out a sequence with the Movie Render Queue to achieve high-quality results. I then put the rendered sequence into Davinci Resolve to apply basic color correction and overall tweaking by adding simple effects like a vignette.
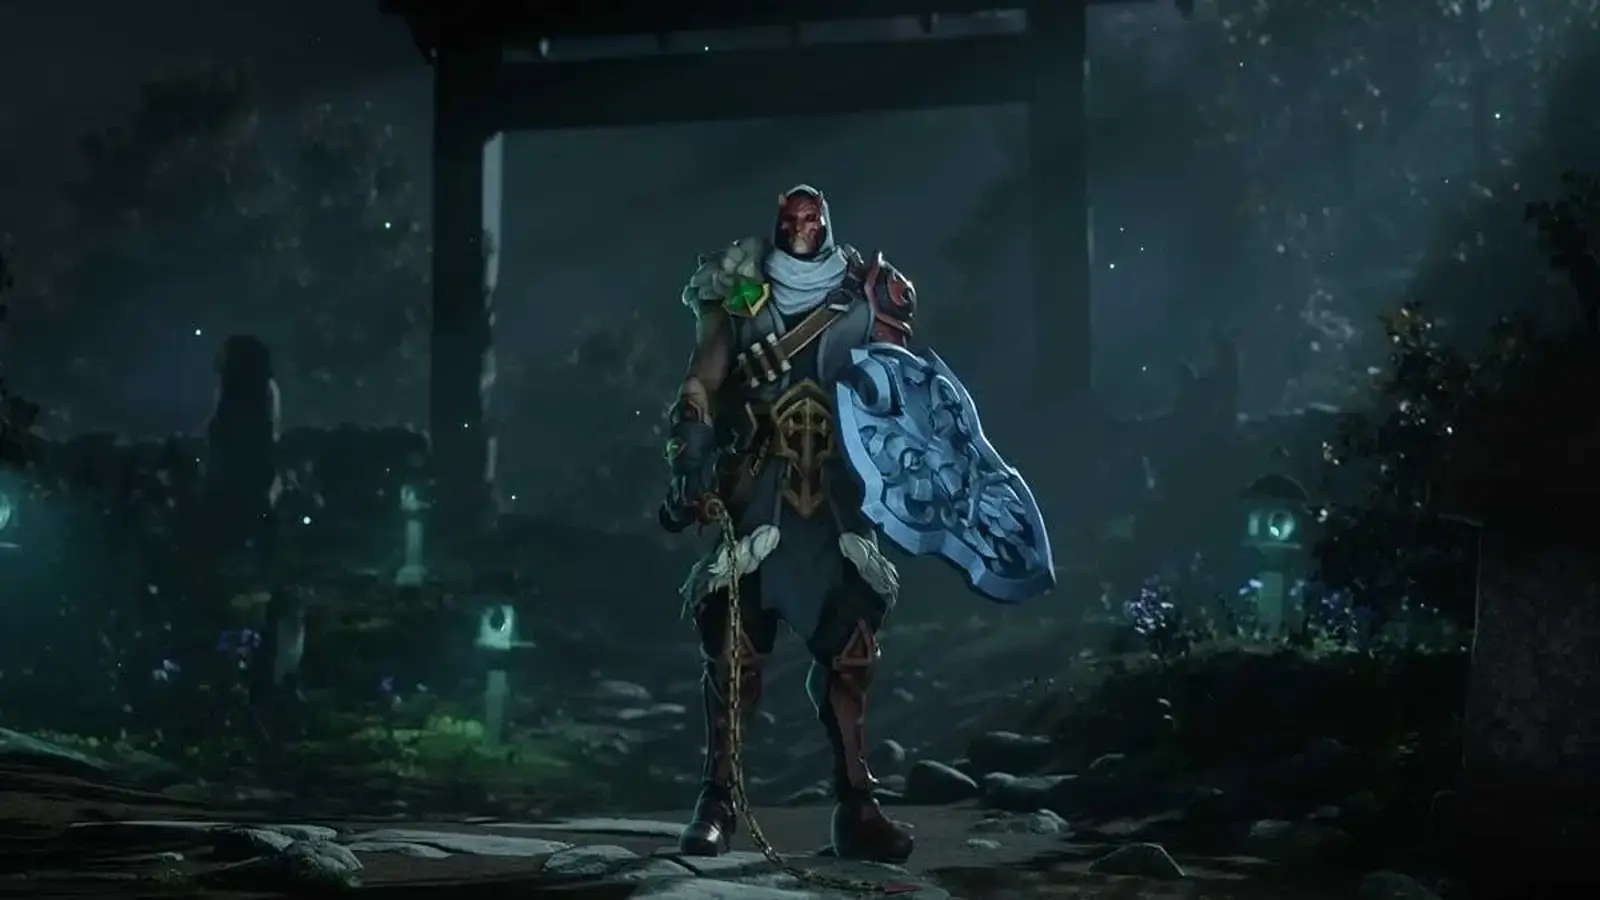
 Benjamin's final render of Alumon: environment created in Unreal Engine, then color correction and overall tweaking done in Davinci Resolve
What’s next for you after you complete the 3D Modeling Specialization Course?
For now, my priorities lie in creating a high-quality portfolio so I can apply at studios I am interested in. Furthermore, I plan on creating more projects to refine and further improve my skills because, in my opinion, as an artist, you should never stop learning — I aim to keep growing with each project!
Check out more of Benjamin's awesome work on ArtStation and LinkedIn.
Learn 3D modeling and create impressive characters like Alumon!
If you love the idea of sculpting unique characters and building amazing virtual worlds, then 3D modeling could be the career for you. At CG Spectrum, our 3D modeling courses follow a job-focused curriculum and provide career training and support from industry-experienced mentors who have worked on some of your favorite films and games.
Study 3D modeling and learn to sculpt your own stylized 3D character models!

Related Links